Volvo Maintenance FAQ for 7xx/9xx/90 Cars Top of Page
You will need a lift that will support the vehicle by the chassis, not by the tires. You will need at least one coil spring compressor, the type that goes inside the spring and has two sets of flexible jaws... two is highly recommended. Air tools will be a big help as well, as it can get mundane and difficult to compress the springs by hand. Also in the air tool department, a cut-off tool to cut the pigtail off the rear springs (get to that later). You'll also need a socket wrench set to remove a few bolts securing the brake caliper (to move it out of the way so you don't rupture a brake line... learned that the hard way) and the bolts that secure the shock. You'll also need a block of wood that will keep the trailing arm extended while you compress the spring. A large pry bar may also come in handy.
As for the parts themselves, I got two
Bilstein B46-1662 shocks. ![]() I got them for about $120 for the pair (I think) from shox.com. I
also got IPD overload coils for a 200-series... wagon preferred, sedan
OK. When you cut the pigtail off the springs, they're a good fit.
Finally, you'll need something to spread the rear springs about an inch
or so... I got the kind that twist into the coils (two on each side) from
auto zone... any discount auto chain should sell something similar.
I got them for about $120 for the pair (I think) from shox.com. I
also got IPD overload coils for a 200-series... wagon preferred, sedan
OK. When you cut the pigtail off the springs, they're a good fit.
Finally, you'll need something to spread the rear springs about an inch
or so... I got the kind that twist into the coils (two on each side) from
auto zone... any discount auto chain should sell something similar.
The only modification I needed to make
was a small change to the lower shock mount... a machine shop should be
able to do this for minimal cost, or if you have access to the right tools,
it shouldn't prove too difficult to fabricate. It's simply a piece
of steel tubing that's passed through the lower mount, crimped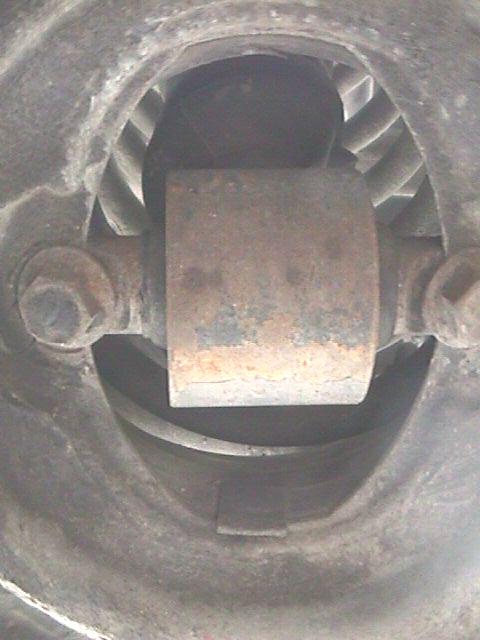
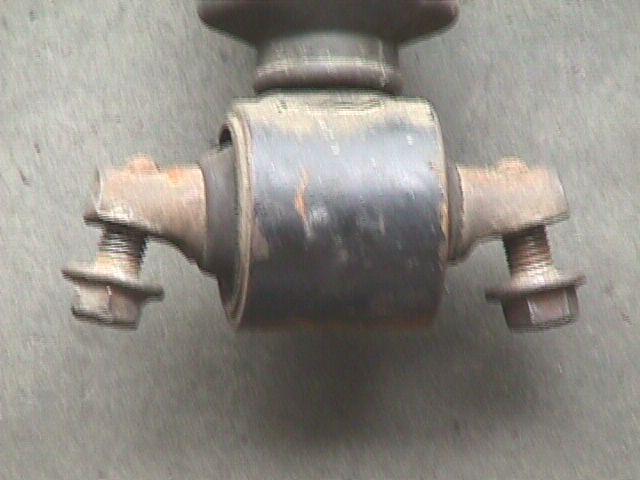 together,
drilled, and then slightly bent upwards. Once you get the parts and
have a close look at the old lower mount on the Nivomat, this cryptic description
will become much clearer.
together,
drilled, and then slightly bent upwards. Once you get the parts and
have a close look at the old lower mount on the Nivomat, this cryptic description
will become much clearer.
The procedure should take a full afternoon... probably 8-10 hours. I started in the front and worked my way back, because I wanted the car lowered about an inch and not just converted to a conventional setup. I removed the front springs and cut off about a coil and a half... this lowered the car about an inch and a quarter, and made the suspension a bit stiffer. I'm sure 700 series lowering springs would also do the job but I'm cheap and cutting the coils worked just fine.
In the back, the only difference between lowering and just converting is the size of the spacers you must put in the rear springs when you're done. If you use about 1" spacers and cut the front springs like I did, the car will ride level at about 1 to 1.5" lower than stock. If you don't cut the front coils, you'll need to spread the rear springs at least 2"... I wouldn't try it; get some springs custom made instead.
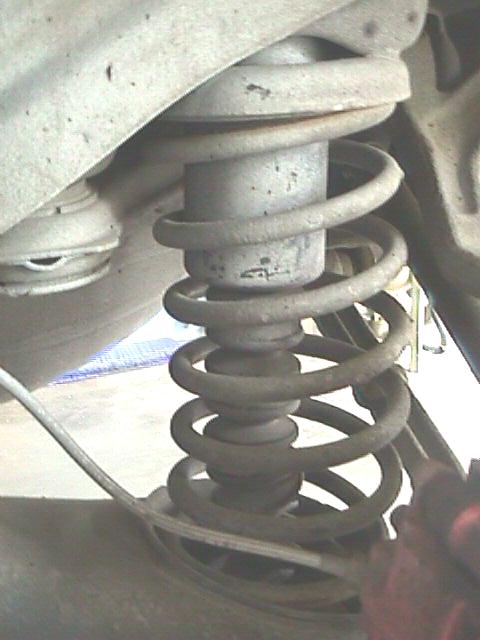
Regardless of which spreaders you use, you've got to remove the Nivomat shock first, then put in the wood block to keep the trailing arm fully extended. I think I stuck the one I found between the top of the fender well and something else off to the side, I really don't remember. Just make sure that it is sturdy (I used a 4" by 4") because when you compress the spring and remove it, the trailing arm is going to want to retract, seriously limiting your room to work. Remove the brake caliper so it's not in the way, and so you don't bust a brake line by mistake.
Compress the spring and get it out of the top spring seat so that you can pull it towards the fender well opening and out to freedom (this is the tough, time consuming, and quite frankly DANGEROUS part). I put two spring compressors up inside the spring with one end of each one clipped as high up on the coils as they could reach, and the other ends dangling loose below the trailing arm. Then, I placed two sturdy wrenches across the hooks that were hanging below the trailing arm... that way, when I began to compress the spring compressors, the wrenches prevented the bottom end of the spring compressor from retreating back up into the trailing arm hole. When they stopped at the bottom of the trailing arm, the compressors began to pull the top of the spring down towards the bottom of the spring, gradually unseating it from the top spring seat. Unfortunately, as I compressed the spring compressors, the long bolts will ran up into the hole for the shock, preventing me from tilting the whole damn thing over to the side and freeing the spring. This is why it's nice to have TWO spring compressors... Once the spring was fully compressed by both compressors, I let up on the outboard one (closest to the wheel well), pulled the spring towards me so that part of it was outside the spring seat, and then reinstalled the one I loosened with its bolt on the outside of the shock hole this time. This allowed me to compress it enough to get it more than halfway out of the shock hole at the top... then I released the spring compressor that was still sticking its long bolt up into the hole, and I pried like hell to get the whole spring out.
Take a break, grab a soda. No beer...
alcohol and steel in tension do not mix. Installation is the reverse
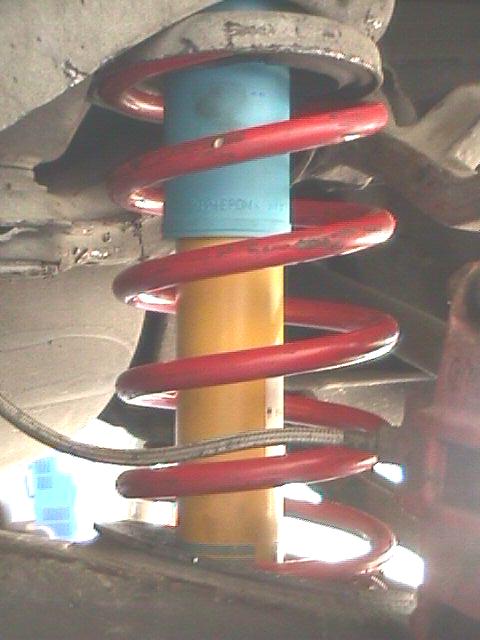
of disassembly. Get the spring back in, then put in the shock (duh).
Next, put in whatever spring spreaders you decided to use... that'll keep
the car from riding on the bump stop. Don't install the spring spreaders
before you put the shock back in, b/c you need to be able to see where
the spring's maximum clearance is. Depending on what type of spreader
you get, you may hear an occasional "thump" as the spreader whacks up against
the shock tube going over a bump or around a corner.
All in all, my car is about an inch and
a half lower, and once I got it aligned, it was extended to the maximum
camber capacity (if you find a way to overcome this, let me know) and the
tires still "squat" a little. Ride is noticeably improved and so
is handling and even gas mileage a bit. The car loves to 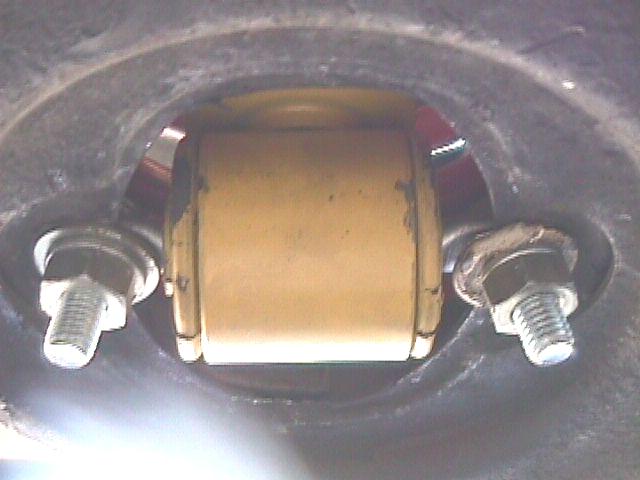 corner,
and dampens out small and large bumps with little complaining. It
doesn't roll as much in the corners and traction is better. This
may seem like a daunting task, but I'd take it on again in a heartbeat...
well worth it!!!
corner,
and dampens out small and large bumps with little complaining. It
doesn't roll as much in the corners and traction is better. This
may seem like a daunting task, but I'd take it on again in a heartbeat...
well worth it!!!